Digital Comparators are More Than Just Readout Devices
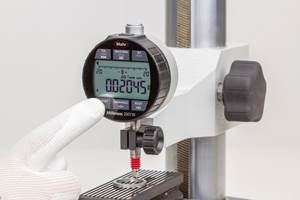
Modern digital comparators often combine the performance of touchscreen phones, LVDTs, digital amplifiers and even small PCs into the size of a standard dial indicator.
#qualitygagingtips
The Many Ways of Measuring Thickness
While it may seem to be a straightforward check, there are many approaches to measuring thickness that are determined by the requirements of the part.
#qualitygagingtips
Tips for Anticipating Hole Conditions
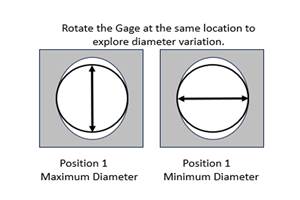
When measuring an ID with an indicating plug gage, it is OK to slow down to learn more about the hole being measured and explore for extraneous conditions.
#qualitygagingtips
Moving from Contact to Noncontact Surface Analysis
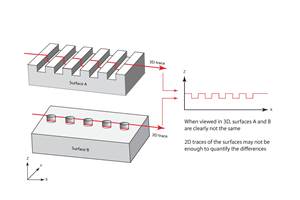
2D measurement systems check specific lines for roughness quality, while a 3D surface analysis provides assurance for a broader area — which can avoid costly process disruptions and bonding failure.
#qualitygagingtips
How to Choose the Correct Fixed-Body Plug Gaging Solution
The two types of fixed-body plug gages are both accurate, fast and easy to use. Consider these factors when selecting one for your gaging application.
#Basics #qualitygagingtips
Combining Multiple Probes: A Recipe for Success
Combining measurement techniques enables a wide range of relational characteristics to be measured with just one or two sensors.
#qualitygagingtips
Centralization Errors Grow as Bores Get Smaller
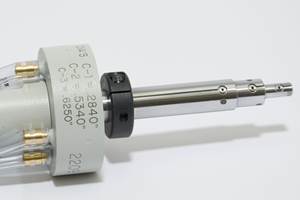
It is important to consider the effects of gage centralization when measuring smaller bores. Selecting the right tool is often based on the bore’s size and tolerance.
#qualitygagingtips
When Evaluating Gage Stability, a Picture Says 1,000 Words
Gage capability programs can help analyze the cause of stability problems, but it can be revealing to manually sketch out histogram data to get a pictorial view of what is happening.
#qualitygagingtips
How to Calibrate Gages and Certify Calibration Programs
Tips for establishing and maintaining a regular gage calibration program.
#qualitygagingtips #Basics
Choosing the Correct Gage Type for Groove Inspection
Grooves play a critical functional role for seal rings and retainer rings, so good gaging practices are a must.
#qualitygagingtips
Calling Home on a Portable Surface Gage
Today’s surface gages have a user interface that is just like a smartphone, and setting them up to make measurement requirements should be easy for the operator.
#qualitygagingtips
How to Choose the Correct Measuring Tool for Any Application
There are many options to choose from when deciding on a dimensional measurement tool. Consider these application-based factors when selecting a measurement solution.
#Basics #qualitygagingtips
Bring the Surface Finish Check to the Part
Dedicated handheld gages can assist the operator in making critical checks.
#qualitygagingtips
Reading What the Dial Indicator Is Saying
Dial indicators provide good value for their resolution. With a glance, one can quickly determine if the part is larger or smaller than the master setting and by a degree of how much.
#qualitygagingtips
Performance Digital Comparators Offer an Alternative to Bench Amplifiers
Electronics today allow for matching the linear variable differential transformer performance and digital indicator size into a new digital comparator that provides even more value than traditional bench amplifiers.
#qualitygagingtips
Determining Out-of-Roundness at the Point of Manufacture
George Schuetz, Mahr Inc.’s Director of Precision Gages, offers these techniques for measuring roundness on the shop floor.
#qualitygagingtips
Sensitive and Strong: Advanced Digital Comparators
Borrowing from cell phone touchscreen technology, user interfaces on industrial gages are increasingly sensitive — and strong.
#qualitygagingtips
How to Choose the Right Cut Off When Measuring Roughness
Measurement results for surface finishing parameters can vary depending on the filter parameter (Lc), also known as the cutoff.
#qualitygagingtips #Basics
How To Calibrate Your Calipers
If you’re interested in calibrating your own digital, dial or Vernier calipers, here are some steps to take to make sure it goes off without a hitch.
#qualitygagingtips #Basics
When Manufacturers Should Use 3D Measurement for Surface Finishing
Two-dimensional (2D) surface profiling systems are the standard for quality assurance in manufacturing, but some applications demand 3D measurement systems.
#Basics #qualitygagingtips


